Tuesday, 29 January 2008

Millenium Falcon - finished


Loads of projects coming to an end now.

Here's the Falcon done. You can see here the brass engine grill, i've painted the clear bit behind it Tamiya Clear Blue. No need really as i've not lit it, but couldn't figure out what else to do with it.

Side shot gives you an idea how narrower the accurising kit makes the ship.

Monday, 28 January 2008

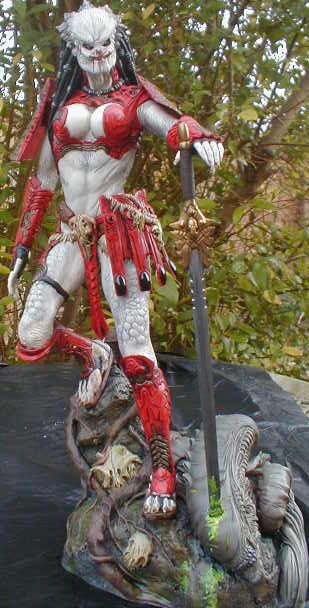
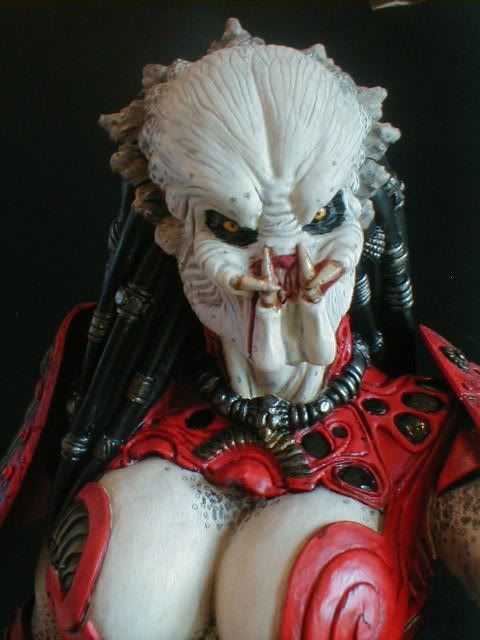
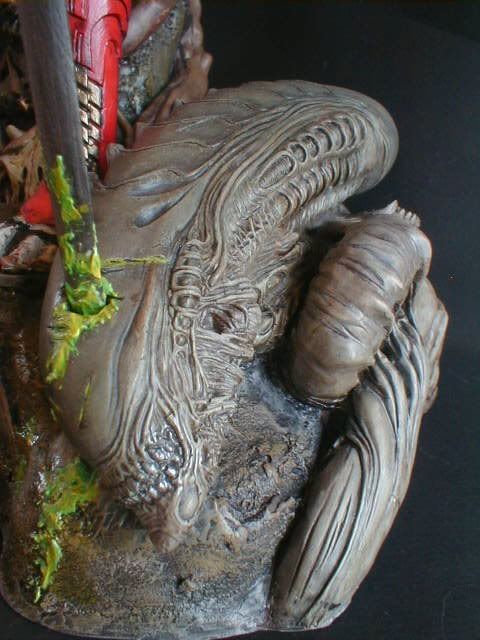
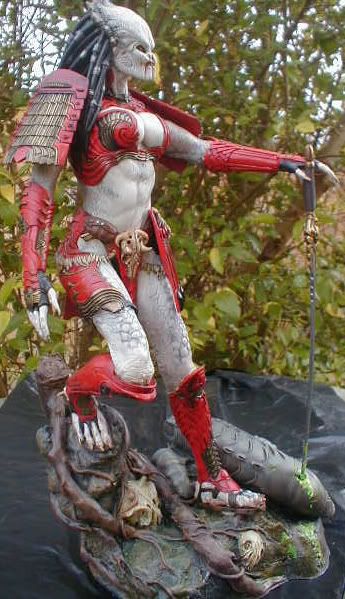
Female Predator - done!


Here she is then.

Apols for the crappiness of the pics - cameras not that good.

Shame you can't see the full detail of the skin shading...

The Elson - cockpit done


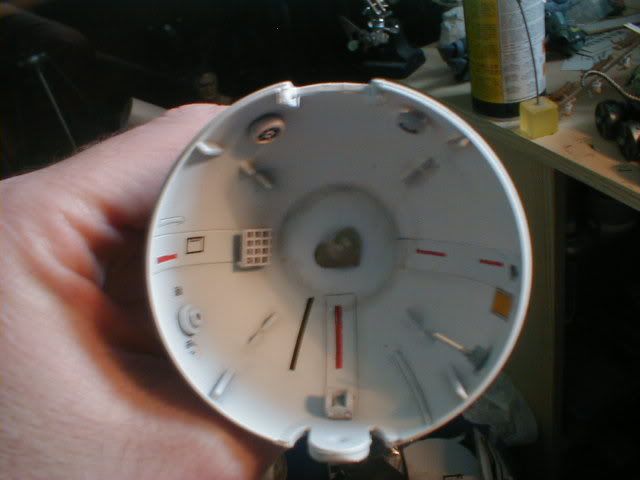
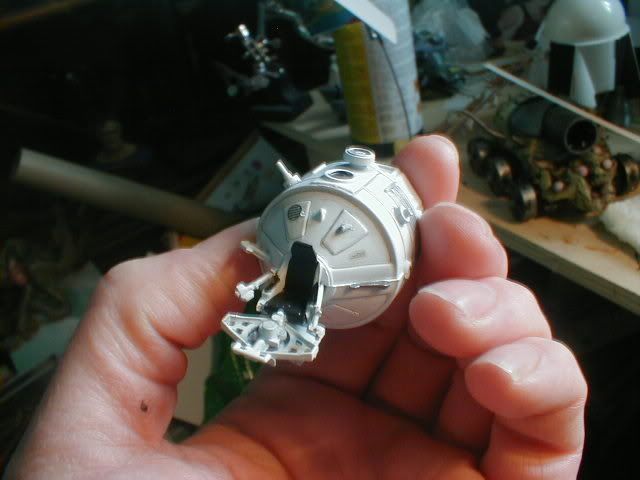
Bit of progress here. This is the rear half of the clear ball, with greeblies attached, primed in grey, based in Skull White then details picked out and a bit of minimal shading with pastels.

Ditto the chair section.

All decals supplied by Top Bloke Tak5haka over on the SFMUK Site. Ta Tak.

Monday, 21 January 2008

Space 1999 Hawk docking bay


So i'm digging out bits and pieces for the Elson and a lot of them are far too big to use.

"Really like that" thinks i "shame i'm not building anything at the moment i can use it on".

Then the lightbulb pings on - this Airfix Hawk that i modified a while back i'd set aside to build a launch platform for.

Thought it'd be a nice challenge to have a go at building something in the spirit of a show rather than something directly from it.

And to come up with a feasable idea of how the pilots get in the darn thing!

So, top pic is the initial stage - an A1 sheet of 3mm Foamboard. I love this stuff; light, easy to cut and glues well with Superglue and also PVA. Not too clear here but i've marked out the dimensions.

Second pic is an easy way of building. The shape is cut out, and the lines where the wall joins the roof and floor i cut just through the top layer of plastic and only just into the foam. This allows me to create the three sections out of one piece, making it much more stable.

Third pic is DISASTER!!!!!!!!!!!!!!!!!!!!!!!!!!!

I'd come up with the width of the piece by putting on the ventilation grill i'm using for the actual launch deck onto the wall and marking off a little bit either side of it. Then built from that and stuck the side walls on.

Offered the grill up to the wall, this time with the Hawk on it and...


i'd forgotten the Hawk is longer than the grill! It only just fits in the box here and looks bloody stupid. So i'm going to have to cut open the side walls and widen the whole thing.

Idiot.

Thursday, 17 January 2008

Falcon - starting the Docking Bay


Here we go then:

An A1 sheet of 3mm Foamboard cut to the right width, the total length of base and rear wall measured out and, where the two meet, i've scored lightly so it ebnds into an "L" shape.

Put in a seperate Foamboard former to break the rear wall up a bit and to also provide structral strength.

The grill there is going to be the main detail piece and is from Wilkensons and a snip at £1.69. I've started putting on greeblies and will be needing a ton in the bottom right-hand corner as thats where the company logo is cast on.

The Elson - filling gaps


You can see here that i've bunged some engines plus a bit more detail on. What i have to address now are the huge blummin' gaps

Wednesday, 16 January 2008

Falcon - engine area


Here's the clear part that came with the accurising kit. I've painted it Tamiya Clear Blue on the inside. You can see its a bit gappy but that doesn't matter as the brass grill will cover that up.

Saturday, 12 January 2008

Friday, 11 January 2008

Predator - almost done.


As there's just snaggings now, thought i'd glue her on.

The Elson - top area


Using this, which is part of a Tamiya tank. Not sure which as its a remnant of something that i cut down. There's a gap at the join that i'll have to address.

Predator - panties


Thought i'd put these up. Not as a smutty undie shot, but to show just how much of the detail is going to be hidden forever once the armours on.

The Elson - things to face


First up, the Saturn V cone. I'd built and painted the kit 30 years ago. Not only is there 30 years of grime on it, there's enamel paint slopped on and glue's squished out the joins. Got to deal with this before i can use it.

Here's the underside piece that i'm going to use. Its part of the Star Wars Virago kit. Trouble is, before i can glue it on, i need to build it up onits top rear surfaces as there's too much of a gap between that and the underside of the hull.

Speaking of which, the underside will need a lot of work as there's no detail at all - its meant to be glued to the other wing section. Planning on putting on panel lines and maybe some really inappropriate semi-spheres to make it a true 70's spaceship

The Elson - a question of scale


Elson's what i'm going to call it for the time being, at least till i think of something better.

So, scale.

Was toying with either 1/72nd or 1/48th. Decided to go with the former. In the top pic here you'll see a 48th scale figure that i've been holding back for just this sort of project and reckon would look really good. Alas, at that scale the ship'd be no bigger than a car. So i nixed that.

Second pic is it as 1/72nd, with part of the Revell MIR kit as the busy part of the cockpit, with one of the chairs from my original Faclon kit bunged on front.

I'm planning on having control devices on arms coming from the rear and below, up round to the pilot.

Thursday, 10 January 2008

Peter Elson style spacecraft


I know its a bad idea to start on a new project right now, especially as i've got so many tucked away half done in boxes right now, but i'm coming to the end of the helmet, Pred and Falcon builds and have a hankering for another spacecraft.

I've been eyeing up this clear ball for a while but couldn't decide what to do with it. Talk over on the SFMUK site turned to Chris Foss and Peter Elson artwork and i had my theme.

Here's where i'm at at the mo - the ball, the top cone from the Airfix Saturn V and the lower half of the 1/24th Harrier wings turned upside down so they are raised up a bit. All held togther with Blu Tac.

The ball actually hinges open so i'm having it as not so much a cockpit but an observation ball. Just got to decide whether its going to be 1/72nd or 1/48th.

Sunday, 6 January 2008

Stormtrooper Helmet - frown done


You might be able to see here that there's black mesh behind the frown gaps.

In the second pic you can see how it was done - el cheapo car repair mesh from Halfords, cut to size, sprayed black and glued in place.

Simple, cheap and very effective.

Thursday, 3 January 2008

Predator - ain''t she purdy?


Again, lightings crap at the mo' but this gives you an idea where i've gone with her

Stormtrooper Helmet - latest progress


Here it is with eyes and frown done, Aeriators put in, front trim on and roughly screwed together

Predator - Alien quandry


Very pleased how the paintjobs come out on the fella (but, due to crap lighting at the mo, this pic doesn't really convey it) but the niggles been - "gloss or not gloss"?

I really like it with a satin sheen but others reckon it should be glossy.

In the end my mind was made up by what to do for the soil. Its texture is like stone, and that's what i started out doing, but the two skulls are embedded in it, suggesting soil or mud.

In the end i've goen with washes of brown over the stone colours, then an icky green/brown ink mix to make it look real swampy.

That's dried real shiny so can't really have the alien shiny too as the whole thing'll end up looking like something from Danbury Mint.

Tuesday, 1 January 2008

Falcon - a cheat


This is the underside, with the landing gear attached.

As i'm gonna have the Falcon displayed in a landing bay, the only areas that will be seen are the top, right side and maybe the front.

Because of that, there's no point in really going to town detailing the underside, nor pastelling anything other than what could be seen from the front of the diorama. So i've just done a bit.

Falcon - pastelling done


Here she is then, pastelling done and i'm starting to put in blocks of solid dark colours.

Friday, 28 December 2007

Falcon - pastelling started


The bit i've been looking forward to for a long time now.

As you can see, i've only the lefthand side to do - and it shows how the pastelling can really take back the brightness.

Its not strictly accurate weathering - i had the Sculpting The Galaxy and Star Wars Archives books open in front of me - as the studio models didn't have an awful lot really, just a matter of straks across panels.

But i really like each panel line to be highlighted, so that's what i did. Not really got any qualms over it as, even though i've used an accurising kit, its still nowhere near what it should look like.

If i had the Fine Molds version it'd be a different story.
Anyway, the pastelling is just a coupla greys to block in the shading, black in the centre of that and various browns to warm things up. Orange for rust too.
The trouble i have with pastelling is that there's never any true blacks to give a bit of contrast - everythings very pastelly.
So this is just the start. Once done and sealed, i'll be putting in washes of blacks and stuff, airbrushing below the 6 round engine things and put in the metallics.

Predator - mottling mistake


Indeed.

They idea i had of doing her bumpy skin areas in black then dark grey has fizzled out.

Got this far before deciding its a crap idea. Goign to repaint here and go with washes over the lumps. Figure that'd be more natural looking than stark areas

Wednesday, 26 December 2007

Predator - armour quandrys


Its been giving me the most difficulty so far. I went with the same scheme as the pads but it looked FAR too dark.

The Vallejo Red doesn't cover too well so here i've drybrushed it with white before going back over with the red. Did the trick and its a much more distinct shade now.

You'll see there's some areas blocked in black. The chains will be drybrushed with Bronze and Oily Steel. The circular inlays i'm leaving black as a bit of contrast, along with a bit of a tie-in colour to bridge the stark black of the dreds and the eyes to the paleness of the skin.

Predator - face done


Well nearly anyway - the teeth need a a last bit of work then them and the eyes glossed.

Strormtrooper Helmet - eyes and frown done.


Well fiddly this, the frown gaps especially - drilling small holes with the Dremel, then widening it out with files and then sanding the edges smooth.

Had plenty of reference pics but kept being paranoid that they weren't wide enough/too wide, too tall, too short.

Falcon - getting there now


Here we have the various panels picked out in their various colours.

Looked dead silly i can tell you - but better now i've started outlining all the panels with a sharp pencil.

Merry Christmas


Well it certainly was for me - finally could get this lovely piece of art out of its packaging.

It was done by the brilliant Chris Weston for the DAR07 charity auction back in October. A whole bunch of 2000AD artists were asked to do something that was SF/horror/fantasy from film or the telly.

Chris went for Moonraker as, until Raiders came out, it was his favourite film ever.

I had some money from me mum with me to get something for Christmas and i put it together with some of my own to buy it. Real chuffed to own it - need a decent frame now.

Also chuffed to get and Ipod from my wife, along with a DAB radio - which is a complete revelation and makes modelling even more enjoyable.

Saturday, 22 December 2007

Stormtrooper Helmet - underway


Had a long old slog cutting the eye holes out. There's different ways folk approach this but the route i took was to draw in pencil where i figured the cut should go then, using a fresh blade for each eye, continually scored along it until i was through.

Took forever and the temptation to push them out when 3/4 through was great but i stuck with it.

The edges haven't been sanded smooth yet in this pic. And you can see i've drilled out the bolt holes and put one in each side - partly to have an idea how it'd look, but mainly 'cause i were itching to wear it.

Thursday, 20 December 2007

Predator - mottling all done


Here she is then with all the blotches on and sealed.

Dunno whether it'll look ok once all the dreds and armours done but that's the risk i guess.

Falcon - curses


STILL not happy with the paint job - keep looking at the pics and i still prefer the tan version.

So, here i've put on a dusting of Ford Ivory, which is a very intense shiny paint, then a dusting of Skull White to take it back.

Don't care if its 100% accurate - its staying.

Wednesday, 19 December 2007

Predator - finishing the skin


Thought i'd copy Dave Fisher in AFM and use permanent markers for the mottling.

Trouble there was that my local art shop on has black.

Tried that and it were 'orrible - FAR too dark, and doubtful if it'd dry.

Instead am going this way - using 2 shades of dark grey pencil, 3B and 5B.

Starting with the lighter of the two, mapping out where i want the mottling to go, varying full blotches with circles.

Then i'm filling in the centre of the bunches with the darker grey.

Going quite well at the mo'

Predator - trying on the armour


Thought i'd Blu Tac the nearly finished armour on to see how it goes with the nearly done skin.

Predator - what a booby


Indeed.

Was busy putting grey washes on the gal, leave it to dry - and look what happened. A lovely dark streak of grey in the cleavage.

Was a bit worried how to deal with it as its pretty recessed (told you she was a big girl) but in the end managed by putting a thin line of Bleached Bone on top.

Tuesday, 18 December 2007

My BIG project...


... arrived yesterday.

As you can see, its a full size Stormtrooper Helmet. Been doing some research and this seems to be the best thought of of the versions out there re accuracy and is by Authentic Props.

Only thing i need to alter is the sheet of clear green for the lenses as its far to light.

Falcon - colour probs


Ever since i've started this project i've wanted to copy the colour of the one on the left here, which i built in 1981.

Trawling round the car shops didn't turn up the right colour.

But, looking at reference pics, that's not an accurate colour.

What i've done on the new one on the right is.

But i prefer the left.

So, what do i do? Be accurate or go for personal choice. In the end decided to go with accuracy, no matter how much it rankles.

For the record, the colour on the new one isn't out of a can but a build up of paints, which were:

Chaos Black,

Ford Polar Grey,

dusting of Skull White

Predator - skin tones underway


Really not apprent here but she's pretty much done with the skin.
I went:
Based with Bleached Bone,
highlighted with that mixed with white,
washed and mottled with Vallejo Greeny Grey.

Sunday, 16 December 2007

Predator - Alien done


Here's the fella then.

Done thus:

primed in Chaos Black,

based in Liquetex Neutral Grey,

drybrushed with Tamiya JA Grey,

washed with a black/brown ink mix and dabbed off randomly,

drybrushed again with the JA Grey