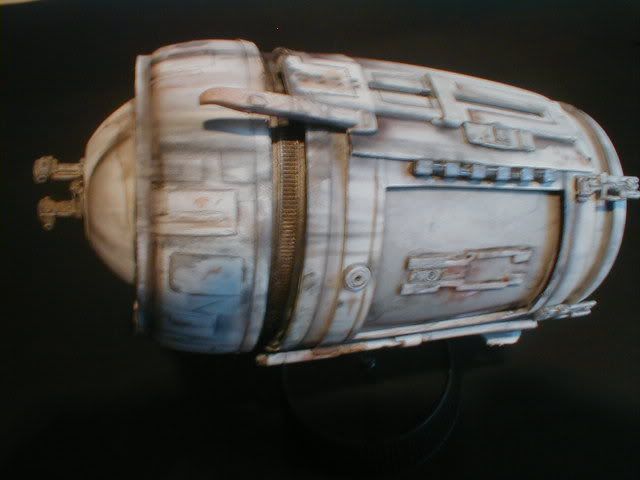
Friday, 30 November 2007

Falcon - ah, poo


So, start to glue the side walls on.

The instructions recommend to glue with Epoxy Resin and then back it up from the rear with Epoxy Putty.

Get the first piece and stick it on with Araldite Rapid.

BIG mistake - the side piece slips and slides, won't stand straight and, when i do prop it up, it sets wonky.

Not a happy bunny and had to think of a different way.

This is me a little further down the line. What i've decided to do instead is glue with Zap-A-Gap superglue then smear Araldite on the inside join to strengthen it. Maybe some Green Stuff as well just to be sure.

Falcon - accurising kits arrived...


... and i've cracked right on.

First part to tackle are the side walls. Here you can see some of the new one's with their original counterparts - new one's on top.

Falcon - cockpit finished


Pod Racer - engine


Here's the main part of one, with the blanking plate covering up the hole made when i removed the black bit.

Got to cover it with wire and stuff to disguise it.

Hellcannon - progress


Das Pronto for the body with the greeblies stuck in.

Thursday, 22 November 2007

Falcon - entry corridor


Here's the decal. It attaches to the clear piece at the end of the box affair for the corridor. A simple matter to wrap the tabs on the decal around the edges.

Second photo shows it in place and with the LED sat behind it.

I know it was something i wanted to avoid with the cockpit, but i really had no choice in this case but to backlight it.

Falcon - cockpit seating


This is something that i needed to address.

If i was going to try and make the kit more accurate by altering the sides, engine and turret, i couldn't really have the manky cockpit interior suppied, especially as i was going to light it.

The trouble is - no "dashboard" and only two,very basic seats, as you can see here with my 1980 effort (apologies for the paintjob - was young).

First thing i did was ping Luke and Chewie off their chairs, scrape the glue off the seat area then affix them behind the new chairs in the new cockpit. The shape of all four are nowhere near accurate but there has to be a point where i go "enough" in the rivet-counting stakes.
Here i've painted them all black, along with the bottom of the cockpit piece. This is to stop light bleeding through the plastic when all done.

Next was the control area. I knew i had to scratchbuild one and that proved trickier than i thought it would. Not the building, the researching - there are so many contradictory versions on the net.

So went with a compromise that you can see i started here, built of cereal packet card and carefully measured so it'd fit into the nose of the cockpit.

Falcon - lighting the cockpit


Here we have the rear wall with decal attached.

I ummed and ahhed on how to light this. Was going to go with what a few folk have done and have it backlit.

They used light sheet though and i was worried that it'd look just like what it is if i used a LED in that manner - a light behind a piece of paper.

So went with drilling a hole at the bottom of the rear wall and feeding the LED wires through.

The LED is going to nestle between the two rear seats and, i hope, won't look too naff.

Falcon - getting started and lighting


So, i built the landing gear, guns for the turrets and glued in all the recessed blocks of details.

I assembled and painted the entry ramp and put it in place.

The decal set had arrived and i stuck the rear cockpit decal to the crappy clear piece that comes with the kit.

I had to decide what to use for lighting at this point and went with ultra bright LED's, powered by a 9 volt battery.

I marked on the lower hull where the floodlights should go. Should say at this point that i didn't go with all the floodlights the Falcon has by the time of Jedi but rather stuck with the one each side of the boarding ramp and two to balance it on the other side.

This pic shows the holes drilled and bulbs in place. Also wired in are the bulbs for the entry corridor, cockpit and turret.

The cockpit and turret ones are on connecting blocks as i need to attach the to other parts of the hull.

You can see the jack socket top left.

Accurising the AMT Millenium Falcon


I started this project back in July (!) and am about halfway now.

The reason for that - and also why i've not mentioned it before - is:


I wanted to get the Fine Molds Falcon but couldn't justify the expense all in one go.

Digging out my old AMT version that i built in about 1980 had me hankering to build one of those again as a substitute.

But i've always been put off by the totally inaccurate, far too chunky sides to it.

Changed my mind when i found an accurising kit. It was out of stock but i pre-ordered one and figured i could build the kit as far as i could in readiness.

Did that alright - but its been nigh on 4 months for it to be back in stock and so i've had to take the unprecedented step OF PUTTING A KIT BACK IN THE BOX.

You've no idea how alien that is to me.

Anyway, the kits on its way, so i though i'd let you in on what i've done so far.


Buy an AMT kit for £15.00 off eBay.

I'd also found by this point a decal set which has brilliant reproductions of the cockpit walls, the corridor at the top of the entry ramp and the engines. They were in stock at Cultvman and came quite quickly.

As the cockpit was going to look the nuts, i decided it had to be lighted. And, if i was doing that, i must do the entry corridor too. And why not the floodlights underneath?

This was getting to be ambitious.

Even more so when i found a guy in Germany doing detailed Gun Turret interiors. So i bought one of them. And it'd be a shame not to light that as well.


Getting power to the ship was something i had to consider and i went with an exterior source, fed through a minature jack plug.

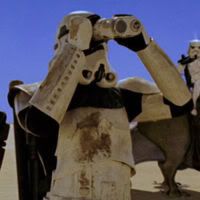
Figuring i could disguise it as a power feed (which of course it is) in a docking bay, i hit on the idea of a Tatooine-style location - what i'm aiming for is something like the shot above.

Sunday, 18 November 2007

Podracer - pastelling the panels


I'm going over the pencil marks i'd made with pastels, applied with a flat edge brush.

I'm using a mixture of black, grey and browns.

At this stage i'm just starting to outline them - not proper dirtying down yet.

Pod Racer - starting to put the panels on


Not too clear here, but i've started drawing on panel lines with pencil.

Using a sticky label as my ruler as i can get it to stick to the curved surface and stay in place while drawing

Hellcannon - bits and pieces


Some of the parts i'm planning on using.

The ribbed barrel is the lid of a Brut aftershave bottle (not mine), beads for eyes, and nice 'n nasty bits of kits to have ripping through the skin.

Hellcannon - chassis


Here i've removed the catapult section and glued a piece of Foamboard into place as the support for the body of the beastie

Thursday, 8 November 2007

Nurgle Hellcannon


I'm getting a Nurgle army together but the one thing its lacking is artillery.

I'll be stuffed if i'm gonna fork out 30 quid for the shop version so decided to make my own.

This is the start:

toy catapult for the chassis and wheels.

Top of an aftershave bottle for the barrel

and the blue thing is off some toy and'll be the basis for the body.

I have it in mind to be some hideous bio-mechanical device, masses of rotting flesh with machinery tearing through it.

The barrel i wanted ribbed like that as i want it to be chunky and rusty and grimy and... 'orrible.
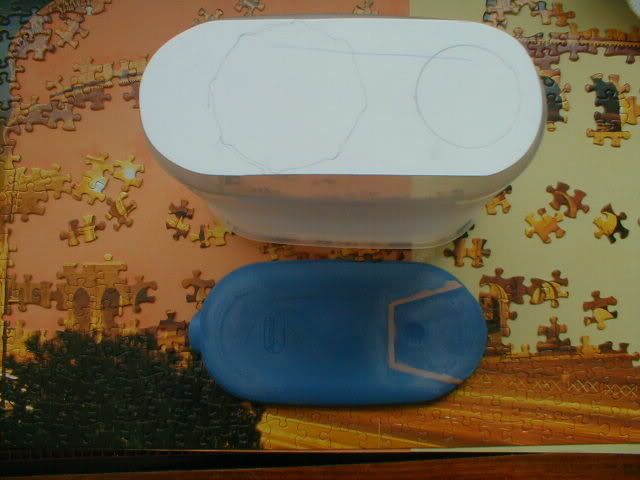
Pod Racer - hacking


Back to the craft and the first thing to do is remove the large black plastic section between the engines.
Its there to hold them togther and house the grappling hook that fires out the side.

I've unscrewed and taken it apart for ease of cutting with the hacksaw.

Pod Racer - Sebulba


First thing i did was prime the fella in Skull White.

Didn't make it too perfect a coat as i'll be painting him pretty much the same colours he already was.

The white that is on there though shows what a terrific sculpt he is. Big too - 1/24th i'd say

Wednesday, 7 November 2007

Pod Racer


What, ANOTHER project underway?

Well, yeah, afraid so.

Still fired up hardware-wise and Star Wars in particular. Taking part in the Pod Racer scratchbuild contest in Nottingham got me hankering to have a go back here at home.

Was toying with the DAR route of scratchbuilding an original design but i did like Sebulba's one in Phantom Menace (Sebulba too, but don't tell anyone).

Anyway, got this off eBay for only a tenner still mint in sealed box and - what a shock!

It's MASSIVE!

And, like the toy Sandcrawler i redid, very accurate. The only downside i can see is the lack of actual engine nozzles on the pod. There's pretty good decals in their place though so at some point i've got to decide whether to go with them or add my own.

All keen to get going on this so afraid the other projects might be neglected.

Tuesday, 6 November 2007

Macrobinocs - 8


Bit of progress here.

This wheel thing on th front was going to be a bit of a problem. On the original they used a part from the "Revell Visible V8 Engine" - which is a pretty hard to get of kit and when you do find one, its too pricey for just one piece.

Went for a compromise that i think doesn't look too bad.

The green disc is the top to a milk carton, the next layer is a 1/35th wheel of a WW2 truck and the actual spindly thing is, i think, from the same kit. Dunno the name but its def Tamiya.

Saturday, 3 November 2007

Tug - 1


Pic 1 - Really shouldn't take anything on right now, but i was having a rummage through my bits box and come across this and really like the shape.


Pic 2 - Its some sort of Kryptonite armour for a Lex Luthor action figure and, when held horizontally, really looks like a the prow of a spaceship. Neat green clear cockpit too.

Anyway, i thought about building it length-ways but i really like it short and dumpy.

It quickly came to mind to have it then as a sort of Tug ship pulling a load around a Space Dock or somesuch - bit like the Nostromo and the Oil Refinery, but on a much smaller scale.


Pic 3 - Here i've filled the rear with plasticard.


Pic 4 - What to use for the load? I knew i wanted flat, straight surfaces to counter the curves of the Tug. At first i was going to with a toy lorry body for the basis, and found one for 3 quid, but it'd make the finished model about 2 feet long. In the end went for this container, a snip at 49p.


Monday, 29 October 2007

Ma Room


Thought i'd post some pics of what my den's like at the mo'.

Avoided the workbench 'cause its a disgrace.

T-21 - first assembly


Here it is screwed together. I've also used No More Nails as glue to be extra safe.

You can see i've roughly sketched out where the detail has to go on the side.

T-21 progress


Here i've rounded off the edges where needed.

Next up is to join the trigger area to the body.

Bit worried about this as there's gonna be an awful lot of weight put on that join.

So, drilled holes for two screws plus, to be on the safe side, have drilled 3 extra ones to pin it as well.

Grand Lunar - starting


Off we go.

Just a ball of Bacofoil in the rough shape of the head stuck on a nail

D'Israeli's Grand Lunar


A real added bonus when reading the graphic novel of Scarlet Traces was seeing Matt's concept sketches of the Selenites and Grand Lunar from a pitch to do First Men In The Moon.


Being a massive fan of all things Wells and a cheeky blighter to boot, i asked Matt if he'd mind doing me a sketch of the Grand Lunar and a War Of The Worlds Martian coming face to face.


And, blimey, didn't he do well? Really knocked out by it and, as i've some Super Sculpy sitting around getting dusty, figure'd i'd have a go at a Grand Lunar meself.

Another DAR07


More DAR07


DAR 07


Some pics from the convention that's just finished in Nottingham

Wednesday, 17 October 2007

Macrobinocs - 7


Bit of progress here.

I've had to put a plate of Plasticard on the front as the surface area was raised and ribbed and too small to take the lenses on.

The rear part - which was the lid - you can see i've cut off the raised and filled the pouring hatch with P38, then sanded everthing down. There's still a dimple and a logo but greeblies should cover them.

Star Wars T-21 Blaster


While i'm in the mood for building big, here's the next undertaking.

Always loved this unfeasably large weapon so its the logical choice if i'm gonna build a 1:1 prop.

Online tutorials don't seem to exist but i did find a full-scale blueprint so printed that out.

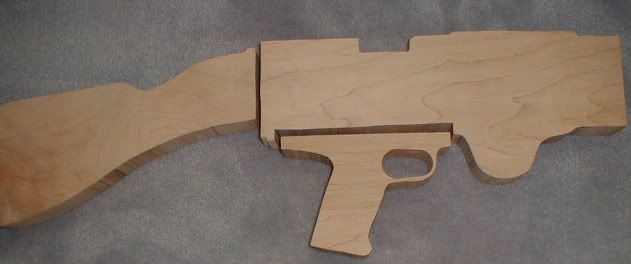
I drew on tracing paper the stock, trigger assembly and main body, and passed them on to a friend who's dad very good at working with wood.

All i wanted was to see if it was do-able, thinking if it was then i'd give him sheets of MDF the build up to the right thickness.

Not only could he do, he did it right away - using quality maple to boot.

Top bloke!

So here are the 3 sections. Next step is sand and make the stock and grip rounded. The its details the thing and bung the 4 inch soil pipe on the front.

Monday, 15 October 2007

Macrobinoculars - 6


... i realised that this section could slip up and into place - no need to try and glue the ragged edges togther.

Phew!

This is where i am right now. I'm going to put a load of Zap-a-gap superglue on the inside and wait a day before moving on.

Macrobinoculars - 5


The proverbial lightbulb popped on and i used the scissors to trim the lid section, leaving an edge of the body because...

Macrobinoculars - 4


That was easier said than done.

I scored around with my craft knife to give a path. Then tried scoring with a Stanley knife, but that didn't have much effect.

I had to use a junior hacksaw but the plastic was very bendy and i couldn't follow the line at all well.

Once i'd seperated the two sections i cleaned up the rough edges of the larger piece with big scissors and, whaddya know?, it cut beautifully!

Macrobinoculars - 3


Both SG's and mine have the same trouble - they're too long in the body. SG got round his by cutting 2 inches from the base and then sliding that short section into the long section.

He could do that because his tapered at the bottom.

Mine didn't so i decided to cut at the top (for no other reason that then the "buisness end" ie the front, wouldn't have any sloppy joins i'd made).

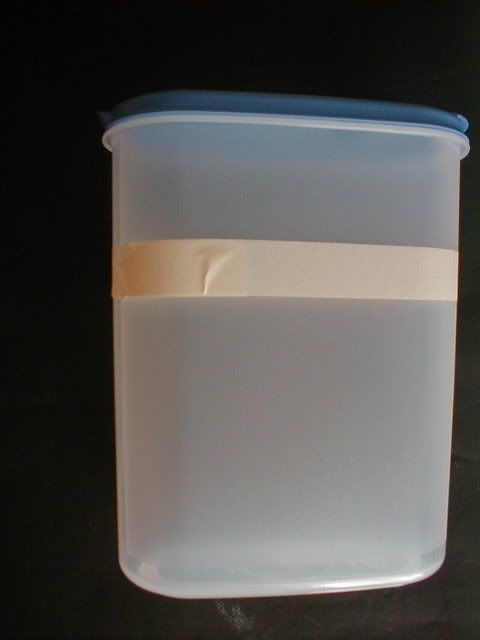
So i marked off 2 inches all the way round then used masking tape to show where i needed to cut.

Macrobinoculars - 2


First up, find the shell to work from.

The States Guy (from now on known as "SG") used a 2.5 litre plastic jug with sealable lid.

So off i went searching through the tupperware sections.

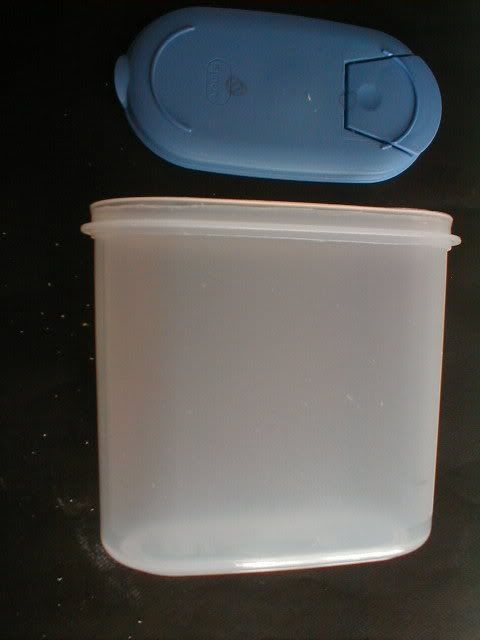
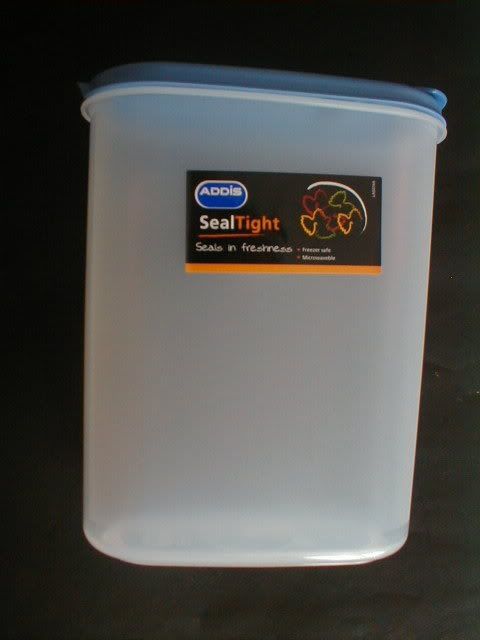
Couldn't find a match but did discover this in Tescos - its a cereal container rather than a jug but its the same capacity and has the added bonus of (a) not needing the handle sawn off and (b) already has a frosted surface - excellent for paint and glue adhesion.

3 quid handed over and it was mine.

Star Wars - Macrobinoculars


I've been inspired to have a go at making my own pair of these after reading the fantastic tutorial by this bloke:


He's in the States so there's no way i'm gonna bt able to follow what he did exactly, but lets give it a go.

Thursday, 11 October 2007

Scout Walker - base


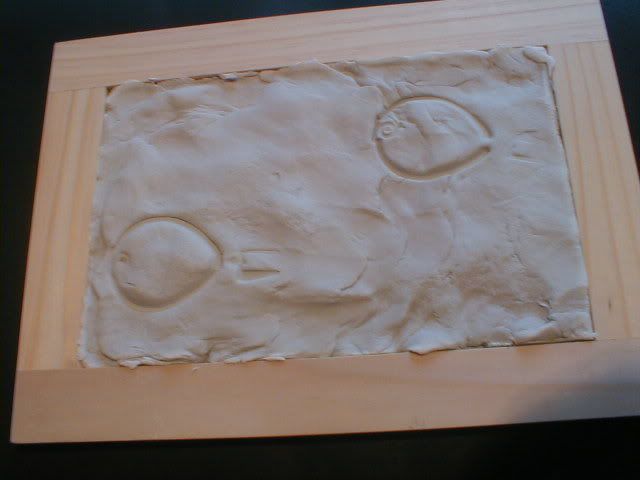
El cheapo way fo doing things - 99p picture frame from Wilkensons and a layer of Das Pronto. You can see where i've pressed the Walker down to create locating marks prior to glueing.

Next up is some Games Workshop scatter material.

Scout Walker - done


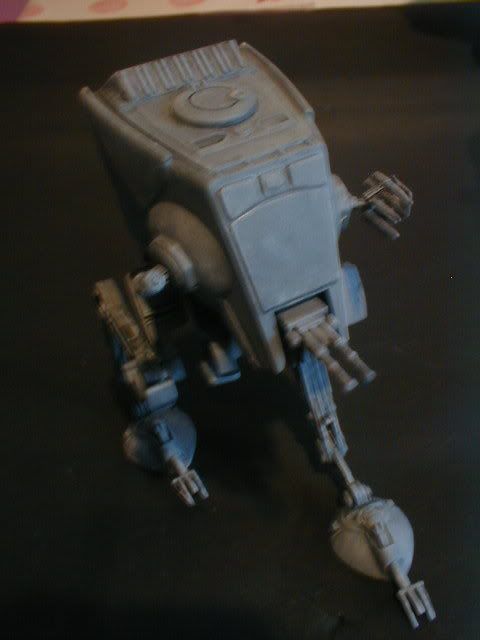
Pretty dark compared the the movie versions, but i'm aiming to put it into a Tatooine base so figure the dusty sand will lighten it up more.

Drop Pod - docking clamp


Drop Pod - side view


Monday, 8 October 2007

ARC 170 - finished


Again, clearer pics to follow but here she is on a stand i made - why didn't they provide optional landing gear?

Really nice kit this, one to make me re-evaluate snap-fits.

Drop Pod - done but in bad light


Put this up as i'm feeling guilty not putting stuff up for a while - much clearer shots'll be here on Weds